Category Archives: behind the scenes

The Search for Oceanspirit Dennis – source code and resource pack released

The Search for Oceanspirit Dennis

Want to see just how messy my code gets when I have too much to do and a fast approaching deadline? Well good news, because you can now download the source code in all its sparsely-commented glory!

Want to make your own Oceanspirit Dennis game, but need some resources to get you started? Don’t want to have to extract them from someone else’s project? Well then grab the resource pack instead, and you’ll get all the art in nice friendly .png files. Some of the backgrounds even have the original Photoshop file, so you can mess around with layers and things. There’s even a few sound effects in there!

The source code can be downloaded here.
The resource pack can be downloaded here.
If you never quite got around to playing The Search for Oceanspirit Dennis, you can download it for free from this page.

Teaser

I’ve been procrastinating a lot recently both with this blog and a couple of AGS projects I should be working on. Had a computer death to deal with then a couple of weeks and several hundred pounds later I discovered I was somewhat lacking in motivation. So I started another short project instead. Oh well, I’m sure both will be finished eventually.

Here’s a slightly-cropped screen shot to make up. Click for zoom.

Ooooh... teaser-y

In other news I increased my year count yesterday. It didn’t hurt.

Flying features

Here’s a little bit of commentary for some of the features in the demo I posted yesterday:

Each game loop goes something like this:
1) Introduce any new enemies that are needed.
Currently the idea is to have a simple function CallEnemy(optional int enemy, optional int x, optional int y) which creates the specified enemy type at the specified location. If no location is specified, a random x value is chosen and y is set a bit above the top of the screen. If no enemy type is specified the function should choose a random enemy from a list of low-level enemies. At the moment there is only one enemy type, and the CallEnemy works by seeing if the number of enemies drawn (ie still alive) in the last game loop is less than a certain value, and calling another enemy if it is.

2) Calculate the desired horizontal movement of the player ship
This is based on what arrow keys are/aren’t pressed, and uses acceleration and maximum speed values. In other words, if a player continues to hold down an arrow key the ship’s speed will change by a higher and higher amount each time, until it reaches a maximum value. This gives a more realistic simulation, but I’m not sure how well it works in the context of this game where control is important. Might be useful for special instances (a specific level or section where the ship is hard to control?).

3) Calculate the desired vertical movement of the player ship.
Pretty much the same as above, but in the y direction.

4) If the player is firing, introduce a new bullet.
A single bullet is an instance of a Bullet structure, which is basically a container for values such as the x and y positions, the graphic to use for the bullet, the x and y speed of the bullet, the animation view to use for its explosion and how much damage it deals. It also contains a ‘life’ value that says how long the bullet has been around. The player has an array of (50?) bullets. This means there can be up to 50 player-fired bullets on-screen at any one time. In order to create a new bullet we have to go through this list of player bullets to try and find one that isn’t in use (its life = 0). If we succeed we can set this array slot up to be the new bullet. If not then… well… the player doesn’t fire anything. At the moment this can’t happen because the rate of fire combined with the speed of the bullets means bullets are disappearing off the top of the screen (and being ‘killed’ by setting life back to 0) before 50 have been shot.

5) Calculate the player’s horizontal position
This is a combination of the results of step 2 and any additional environmental effects such as drag. E.g. setting a drag value at a certain part of a stage could be used to simulate gravity or wind that would move the player in a certain direction unless they flew against it.

6) Calculate the player’s vertical position.
As above. Re-reading the code it’s possible that step 4 should actually happen after this, but at 40 frames a second I don’t think anyone would notice the difference.

7) Calculate the enemy movement, including them firing bullets.
I’m trying to implement some form of artificial intelligence for the enemies. Currently it works like this:
a) Each enemy has a variable pointing at an AI Routine, and a variable pointing at an AI Step.
b) When it needs to work out an enemy’s next movements, the script calls an AI function.
c) The AI function goes to the enemy’s routine, and then looks at the step they are currently on.
d) This step may modify one or more of the enemy’s values such as its speed. Enemies also have a target destination that they are moved towards, so the step may change this. The step may also check values, such as the enemy’s position, and make decisions based on this. Finally the step can call for the enemy to fire, by setting a boolean to true.
e) The step may alter the enemy’s AI Step value, so that a different step is run the next time. It could also potentially alter the AI Routine value, so that a completely different routine is run next time.
f) The script then leaves the AI function and moves the enemy according to the enemy’s values, whether or not they have been changed. Enemies are moved towards their target destinations (in both the x and y axis).
g) If called to fire the enemy creates a bullet similarly to the player in step 4. Enemies use the same Bullet structure as the player, but they have their own array to create bullets in. Each enemy has values telling the script where to create the bullet, what graphic to use, how much damage the bullet does etc. In other words each enemy can have different weapons, but the bullets for all weapons are stored in one array.

The current enemies show a very simple version of this. Their AI routine looks something like this:
Step 1) Set the target destination to be the left of the screen. Set the next step to be step 2.
Step 2) If the enemy has reached the target destination, set the next step to be step 3. Otherwise randomise a number and fire a bullet if that number is a certain value.
Step 3) Set the target destination to be the right of the screen. Set the next step to be step 4.
Step 4) If the enemy has reached the target destination, set the next step to be step 3. Otherwise randomise a number and fire a bullet if that number is a certain value.

Hopefully further down the line this can be used to program reasonably complex behaviour on an individual basis. A huge plus to this system is most of the code will be reused. There’s also the advantage that it’s in its separate global script, so it can grow without making the rest of the game’s code hard to read. I may add a AI Counter variable to the enemy type, so that for example a routine could be run a number of times, then changed to a different one.

8) Calculate movement of all player’s bullets, including whether they hit an enemy, and if so remove the bullet, damage/kill the enemy and create relevant explosions.
This is the major number cruncher, as every bullet has to be checked to see if it’s colliding with every enemy, which is potentially a lot of checking. Obviously this needs optimising. I don’t know how the professionals do it, but I’m using a series of if statements, called in the order that I think they’re most likely to be failed. In other words…
a) Is the bullet ‘alive’. If not, stop checking anything as it doesn’t exist on the game screen, and move on to the next bullet.
b) Is the enemy actually ‘alive’? If not, move on to checking the next enemy.
c) Is the bullet too far to the right of the enemy to hit them? If so, next enemy.
d) Is the bullet too far below the enemy to hit them? If so, next enemy.
e) Is the bullet too far to the left of the enemy? If so, next enemy.
f) Is the bullet too far to the right of the enemy? If so, next enemy.
If all of these checks pass the bullet has hit the enemy and we can move onto checking the next bullet (after destroying this one, causing the enemy to take damage/die and making an explosion).

9) Calculate movement of all enemy bullets, causing the player to take damage and create explosions if hit.
Less of a number cruncher because although there are potentially more enemy bullets, there’s only one area to check within. The player and enemies currently use hit-boxes as they are being drawn at real-time.

10) Calculate background movement.
This is actually the first bit of the project I made. The game has two backgrounds (which could potentially share the same graphic) and works on the assumption that each background graphic is at least as big as the game resolution. It starts by moving background 1, then checks to see if the top of background 1 is below the top of the screen. If it is, it draws background 2 above it to make sure there’s no gap. This continues, with both backgrounds moving down the screen. Eventually background 1 will fall completely off the bottom of the screen. When this happens, background 2 becomes the new background 1, transferring it’s current location and graphic. The game then picks a new background 2 image (at the moment this is from a random list of 3 or 4 graphics) and continues. As soon as background 1 starts coming off the top of the screen background 2 appears above it… and so on.

11) Draw player ship.

12) Draw enemy ships.

13) Draw player bullets.

14) Draw enemy bullets.

15) Draw special effects (currently means explosions).

16) Draw background.

All game graphics are drawn to the screen every frame using AGS’s drawing functions. There are no objects and only one invisible character who’s sole purpose is to sit in the one room so that AGS knows to show it. Graphics are drawn onto the backgrounds of one of 6 full-screen GUIs because:
a) I need something to draw onto.
b) Using GUIs is an easy way of doing layering – so the background is drawn behind the ship while bullets are drawn in front, regardless of when I actually draw them in the loop.
Maybe in the future I’ll convert it to use even less resources, and just draw on the room background.

17) Update status bar.

At the moment this GUI is just a health bar, but later it’ll probably contain other things (ammo, smart bombs?). The health bar is a button, and I’m clearing it to a red colour then using the draw rectangle function to drawn a green rectangle on top with the width determined by the player’s health.

And…?

Hopefully the above is the start of a good framework for producing a progressive, level based shoot-em-up game. I’ve tried to create it in such a way that lots of different elements of the game can be changed very easily, so that when it comes to actually programming a level it should be relatively simple and code light.

But whatever I end up doing with the project, the main point is it’s a fun programming challenge. I keep pushing AGS, and I keep being surprised by what it can do. All of the above takes place 40 times a second, yet I’m not seeing any drop in frame-rate at all. It’s truly an awesome tool.

P.S. If anyone wants a copy of the source code email me or PM me over at the AGS forums. It’s far from complete, and I can’t guarantee that the latest version is stable, but I’ve tried to keep it well commented as I’m going along.
Robbing the Princess facts

WARNING: THE BELOW DEFINITELY CONTAIN SPOILERS! IF YOU’VE NOT PLAYED ROBBING THE PRINCESS PLEASE DO SO BEFORE READING!

For those interested, here’s a few facts about Robbing the Princess:

  • All of the final game script (finished by about the 5th day) got put into the game. There was nothing I was trying to get in that didn’t make it.
  • Like Breakdown I did have a few extra ideas on a strict “if I have time” plan. I didn’t, as expected, so I didn’t do any work towards them.
  • One of the ideas was an introductory  sequence that would teach the player the controls and fill in a bit of the backstory. The player would control Alec only who would be on a train. The player would be walked through a simple puzzle with text prompts teaching them commands such as picking up and using items, then would have a confrontation with the unnamed bad guy on the roof of a carriage. The bad guy would escape by being airlifted by a convenient helicopter – see why I didn’t have time to implement this? – leaving behind his coat (intentionally as it later turns out). The packing slip Alec mentions in the intro of the game would be found in one of the pockets, and Alec would radio Suzy telling her to meet him at the docks.
  • The ending is a bit of a cliffhanger, but I would have liked to make it more so. The end credits show The Princess sailing off into the sunset, and I’d have liked to have a submarine surface behind them at the very end.
  • If I was going to continue the story (and I have no desire or intention to) I’d pick up with The Princess being torpedoed and the player having to solve a puzzle to get Alec and Suzy out of the sinking ship. They’d then escape to a nearby island and probably have to work out how to get back to the mainland.
  • I have no idea what was supposed to be in the crate. Stolen property and/or something that could be used for great evil probably. I never came up with any of that backstory. Hey, Mission Impossible 3 got away with it, why shouldn’t I?
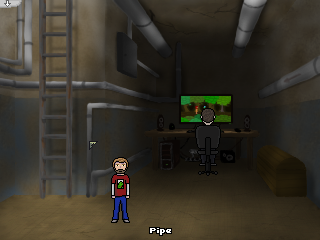
  • I wrote initials are hidden in the otherwise pretty random pebble-dashing on the front of the pub. I then put the ladder and fire escape in front of them, so you can’t actually see them. I did a similar thing with the grass in Erk.
  • I tried to use a particle effect for the gas but I couldn’t get it to work with alpha channels or transparency, so I just hand animated it instead.

Working Title

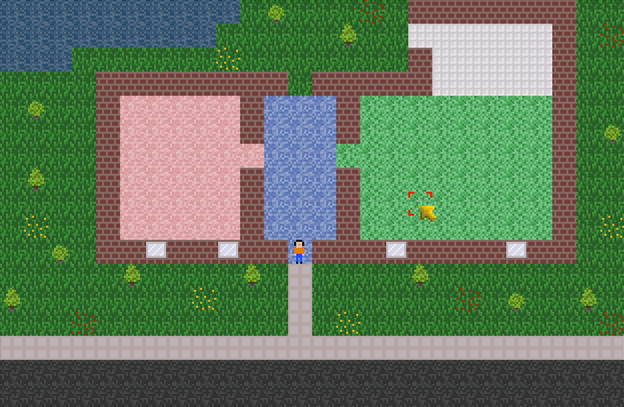
On a bit of a coding high at the moment… found and fixed several bugs in the aforementioned Mystery Project and implemented starting and naming projects. Here, have a screenshot and (working) title!

Don’t get too excited, there’s still an awful lot that needs programming and AGS could still come crashing to the ground with all I’m asking it to do… but its holding up remarkably well so far.

RE: Mystery Project

Little update: I am still working on it when I have the time (and can motivate myself). I could claim that I’ve been busy with work and preparing for an upcoming exam, but frankly I’ve just had a weeks holiday and didn’t touch it once.

Anyway, I put in a good stint tonight and I’m now well on the way with the hardest part of the project, at least from a programming point of view. The problem is I’m doing something very different from what AGS was designed for, so I’ve no idea if what I want to achieve will actually work. I’m getting very close to finding out.

Much more info to come when I’ve decided it’s going to work and I won’t have to scrap the whole idea.

Breakdown behind the scenes – Part 6 – Releasing the game

Sorry for the delay in posting this one, I’ve been on holiday and the Blogger website is blocked by my phone’s internet connection.

SPOILERS ALERT! If you’ve not played Breakdown yet go do so before reading these posts as they contain, amongst other things, a full walkthrough!

So finally I’m there! I’ve got a game I’m happy with, it has all the bits in it that I wanted (within reason) to put in and I’ve played it through a couple of times to make sure it’s all working and makes sense. It’s almost time to submit it, but there’s a few last touches. Hopefully I’ve stuck to my plan and still have a day or two left.

First I send the game to as many of my friends as I can convince to play it and look for bugs. It’s amazing how many spelling mistakes and grammatical errors you can miss in the scores of times you’ve played through different areas. Plus they don’t know the way AGS works and so they won’t be following the same rules you will. Example: In Alan Saves Christmas there’s a door that you need to get through, and in order to do that you need to solve a couple of rather difficult puzzles. I was surprised when one of my friends had managed to complete the game in about 10 minutes with no hints from me, and on questioning him further discovered that he had never solved either of these puzzles. He’d simply clicked on the wall near the door and Alan had walked straight through the door to the area behind it, sending him to the next room.

I also try and get my brother to play through the game, mainly because I can watch him doing it. Watching someone else play can be very eye-opening as they’ll try things you’d never have thought of. Sometimes they’ll do something you didn’t realise could happen and you’ll find bugs that they don’t even know are problems.

Also this is the point where you turn debug mode off. Actually I never use it for testing so I usually switch it off when I start the project, but it’s really easy to forget.

Fix any last problems and test your fixes thoroughly. Now it’s time to show off. I use IconArt by Conware to draw custom setup and exe icons, write massive manuals that hardly anyone reads, write even longer EULAs that nobody reads (these essentially boil down to “Don’t sell my game and don’t pretend that it’s yours”, but they’re kind of fun to write and give me some form of legal standing if I ever wanted to threaten anyone who was misusing my games). Upload the game to my website and create a page for it. Test the download. Mirror it somewhere. Test that download.

Now it’s time to tell the world about it. Generally I make a games database entry first so that I’ll have somewhere to link my posts to (also because I love getting feedback and seeing how many times the game’s been downloaded). Then there’s posts, almost simultaneously in the completed games and MAGS threads with everything cross-linked. That’s maybe a little overboard but I’ve just spent 25 days working on a game, I want people to play it!

Now it’s time to sit back and watch the comments coming in, hoping nobody finds a major bug in the first day. Oh, and this is also the time you promise yourself you’ll never do another time-limited game again.

Fin.

Breakdown behind the scenes – Part 5 – Pulling the game together

SPOILERS ALERT! If you’ve not played Breakdown yet go do so before reading these posts as they contain, amongst other things, a full walkthrough!

Everybody likes different bits of game making. Personally I love coding – coming up with a cool idea, putting in a rough implementation of it, thinking my way around all the possible problems, tweaking the code until it works just right and finally sitting back and seeing it working perfectly in game. This is the reason there is, for example, a fully working sliding door in the engine room corridor.

Unfortunately there’s another side to games called artwork. Pixeling a character can be fun, and I enjoy doing some animation (though not walkcycles, everybody hates doing walkcycles), but you can’t build a game without backgrounds and characters.

When it comes to putting the game together in AGS I focus on the areas I like doing (programming and writing) and do as much of those as I can until I have to draw the next bit of art. This way you can motivate yourself by thinking about all the great things you’ll be able to do once it’s finished.

With big things like backgrounds I also go through lots of versions. When I first start to put in walkable areas, walk-behinds and major hotspots I’ll have an accurate line drawing of a room. By the time I start to put in objects or do animation I’ll have at least coloured it in. Finally I’ll get fed up of looking at it in it’s half-finished state and put shading and texture in.

The same goes for the main character. When I’m just setting up rooms in AGS I only really need one standing graphic for the main character. When I’m testing walkable areas and putting in FaceLocation functions I’ll need all four directions. Finally I’ll get fed up of looking at them sliding around the floor and put in the walk animation… at least for one direction to start with.

Sometimes I do things that I don’t need yet, to avoid doing something more productive. For example the main character has a full set of speech animations. Later I decided to have them never speak, so none of them are ever seen in-game.

From this point it’s just a case of going through the cycle of Implement – Test – Improve until each piece of the game is at an acceptable level of quality.

I also try to work on sections of the game according to importance by dividing them into a set of categories:

Must be in the game
These are things that are vital, so the requirements of the competition must be met, major game breaking bugs must be fixed, the game has to be completable.

Really ought to be in the game
Almost vital things. All other game-breaking bugs need to be fixed, there should be a story or something to tell the player what they’re supposed to be doing. Walkcycles.

Nice to have in the game
These are the areas that start lifting your game out of the average. Nearly all bugs need to be fixed, everything that’s vital to completing the game should be put in and fully interactable and you should start adding in extra items/interactions that aren’t necessary but add to the atmosphere or humour of the game.

Would make the game really good
This is where I would start putting in sound effects, music, extra animation, title screens, cutscenes etc. Basically the icing on the cake. Masses of testing leading to 100% of bugs eliminated.

Would be awesome
Unfortunately this is where my plan to have loads of death sequences fell, so it never made it. Basically this category is where you put your ideas that realistically are never going to make it into the game (under the current time limit) but, if you were to discover you had an extra couple of days, you could put in.

In reality I don’t religiously stick to these boundaries because 1) I wouldn’t want to release something that wasn’t at least in the ‘Nice to have…’ category and 2) I have a habit of avoiding boring (and vital) parts of the game while I make something fancy and fun.

To be continued…

Breakdown behind the scenes – Part 4 – Layout

SPOILERS ALERT! If you’ve not played Breakdown yet go do so before reading these posts as they contain, amongst other things, a full walkthrough!

Now that I’ve got a complete set of puzzles and solutions, it’s time to work out where all those will physically fit into the game.

Of course the number and type of rooms needs to be considered during the puzzle writing stage. It’s very demotivating spending 6 hours working on the background to a room that’s only going to be used as a corridor to get to another room. Fortunately the way the puzzles and story panned out in Breakdown I only needed four ‘action’ rooms, and with a scifi setting I didn’t have to worry about access to those rooms because I could use a teleporter.

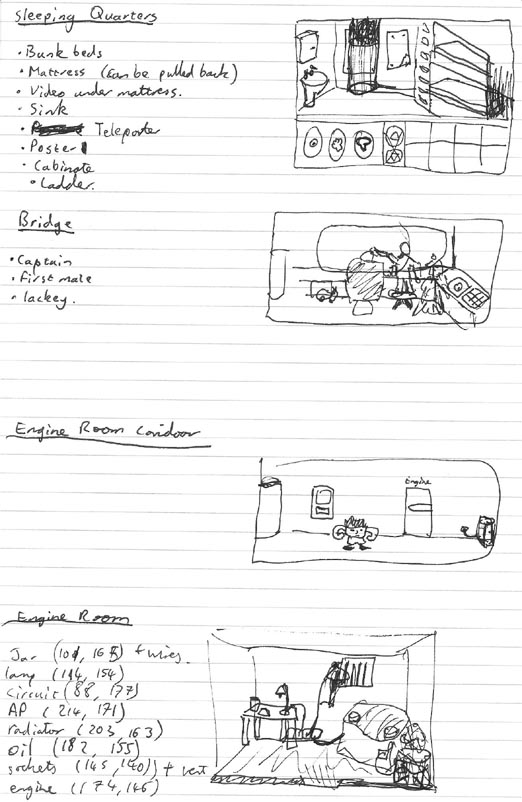
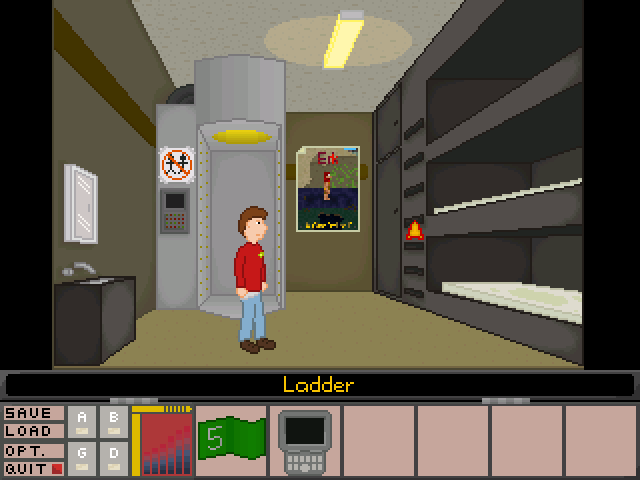
The picture above also shows some simple sketches of the physical layout of my four rooms. You need to fit all the major objects in while leaving room for the character to walk and interact with them. I try to avoid scrolling rooms because it’s already hard enough to make your background look interesting when you’ve got huge areas of single coloured wall or floor. There’s also a nice big user interface (work in progress in the top picture) to take up some more screen space. I hate drawing backgrounds.


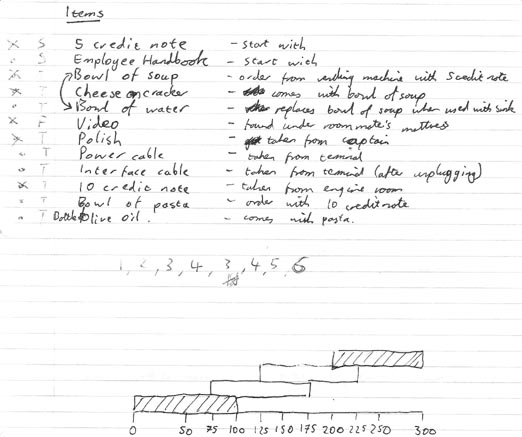
Before starting work on any backgrounds I also needed to design my GUI (Graphical User Interface). For instance, there’s no need to put in inventory scrolling arrows if the player’s never going to be able to pick up more items than there are slots. The picture above shows me working out the maximum number of inventory items that the player can have (and the overlapping bars are something to do with the timing of the automatic door in the engine room corridor).

By the way, we’re still on about day 5 or 6.

Once the GUI size has been decided, and therefore I know how tall each room needs to be, it’s time to start turning the very rough sketches into actual rooms. I used single point perspective to make everything accurate, which basically means the very first thing you do is draw the back wall of your room and pick a vanishing point on it. Everything is then drawn roughly using construction lines on a different layer, then converted to a detailed outline before being coloured and shaded/textured.


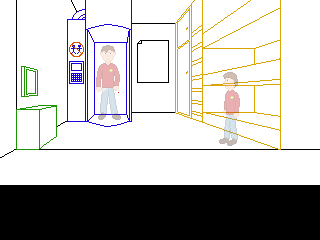
The AGS critics lounge is rather obsessed with single point perspective. If you submit a background for comments and criticism it’s almost certain somebody will start drawing red lines all over it telling you how the table doesn’t line up with the fridge. For the most part they’re right, and single point perspective is a good starting point to draw a fairly realistic background, but it does have it’s share of problems. Most noticeable of these is scaling. Unless you want scaling walkable areas in every single room (and I really don’t – I spent time carefully placing every pixel of that character to make him look as good as I could, I don’t want AGS taking a bunch of them out to draw him at a different size) your character is bound to look too small when they’re in the foreground and too big when they’re in the background. Take a look at the mirror above the sink on the left. It looks fine when the character is next to it because it lines up with his head, but it’s really far down the wall.

Every background in Breakdown is rigorously drawn to single point perspective rules. Every background except one where it really wasn’t working. Did you notice which one? Honestly? Sometimes it’s better to sacrifice realism to make something look better.

To be continued…